How to Create Content Using Scoring Logic
In this article, we will be walking you through how you can create content using scoring logic.
Before we begin, there are two types of logic you can use to create your content in LeadQuizzes.
Scoring Logic
Assign a score value to each answer. Respondents receive results based on their score range.
If you want to use scoring logic, continue reading!
Outcome Logic
Map answers to outcomes. Respondents receive results based on the outcome with the most answers selected.
If you want to use outcome logic,click here.
Scoring Logic Instructions:
If you're here for scoring logic, let's jump into it!
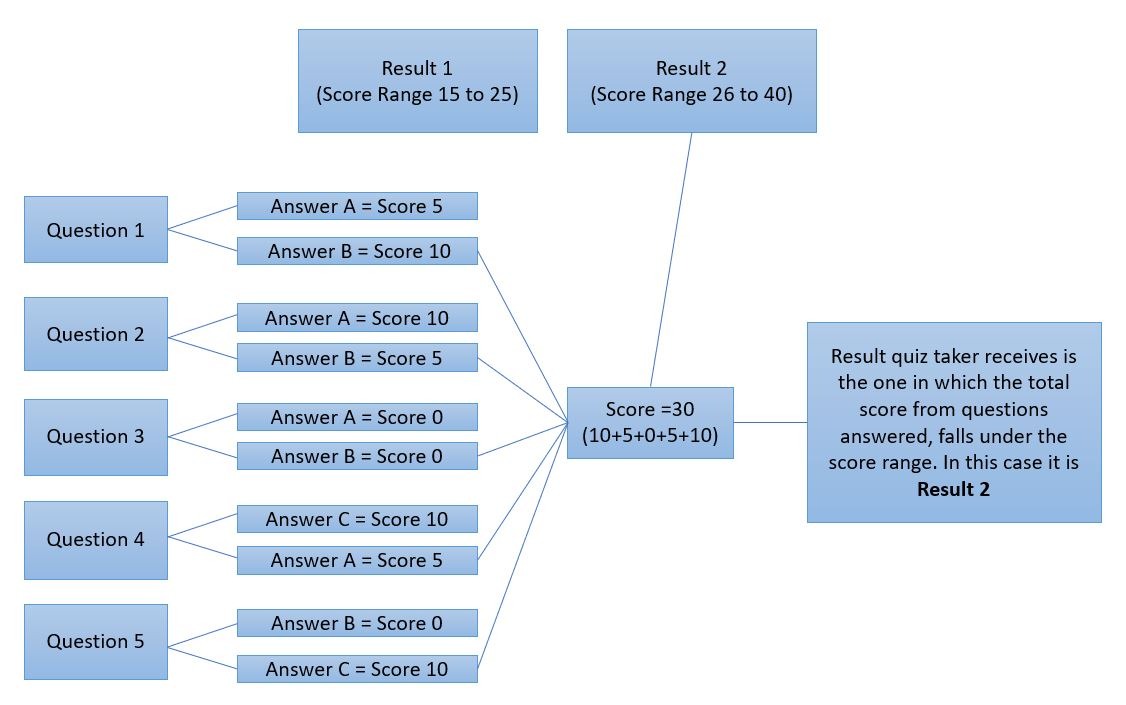
First How Does Scoring Logic Works?
Right now the Scoring logic is set up so that it is score-based. Meaning that you assign scores/weights to the question answers and score ranges to the results.
The result the quiz taker receives is the one in which the total score from questions answered, falls under the Result score range.
Below is a diagram showing how this works:
How Do I Create A Content Using Scoring Logic From Scratch
1. To create content using scoring logic from scratch, go to your LeadQuizzes dashboard and click the ‘’Create’’ button. In the template popup that appears, click on the ''Create from Scratch'' button either at the top right-hand side or bottom-left hand side as shown below.

2. Next, in the ‘’Select Content-Type’’ window that appears, select ‘’Scoring Logic’’.
This option lets you assign score value/weights to each question answer, and the respondents will receive results based on their score range. Next, enter your new content name and click ''Continue'' to proceed.

Note: You will get a warning message if you click continue without selecting the content type, or entering your content name.
3. In the Content Builder window that appears, you will be able to identify what kind of content it is through the label displayed below the Content Name. Next, add a Cover Page to your Content Builder by dragging the Cover Page element to the Start Screen section on the right.

4. Next, create your text or image questions and assign score values to each question answer.
0 will be the default score value of every image or text answer and you are only allowed to enter numerical values including negative numerical values (i.e 2, 10, -5).

Note: You will get a warning message if you enter an invalid numerical value like decimals, percentages, and other special characters.
5. Next, create your results using either the Result Builder or the URL Redirect and assign score ranges to each result.
The score range should be set from minimum to maximum, and you are allowed to enter only numerical values including negative numerical values (i.e 2, 10, -5). You will get a warning message if you enter an invalid numerical value like decimals, percentages, and other special characters.
Also, make sure that the score range from one result doesn’t overlap with the other result's score range.
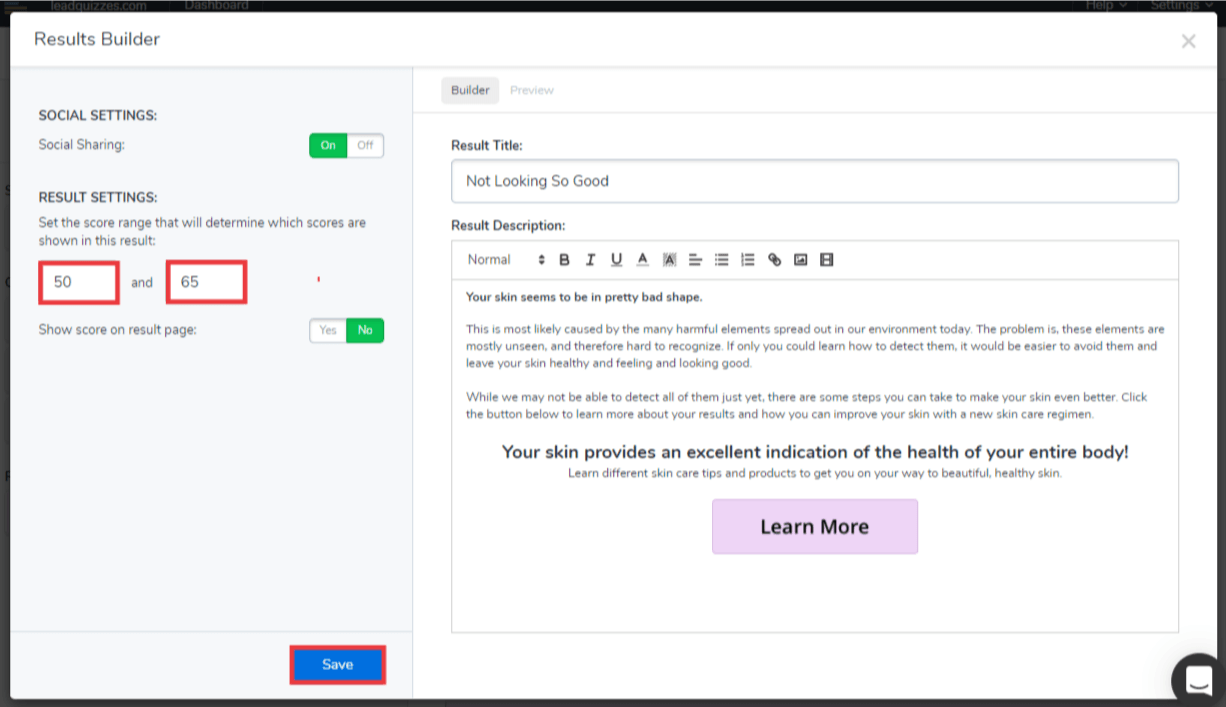
Note: If you click save without entering range values in the text boxes, enter a higher minimum value than the maximum value, enter a minimum value lower than the minimum possible score, or enter a maximum value higher than the maximum possible score, you receive a warning error message.
6. Next, you will have the option to enable or disable showing the score on the Results page as well as set the score display message to what you want it to say. The default score is set to 50 points on the preview tab
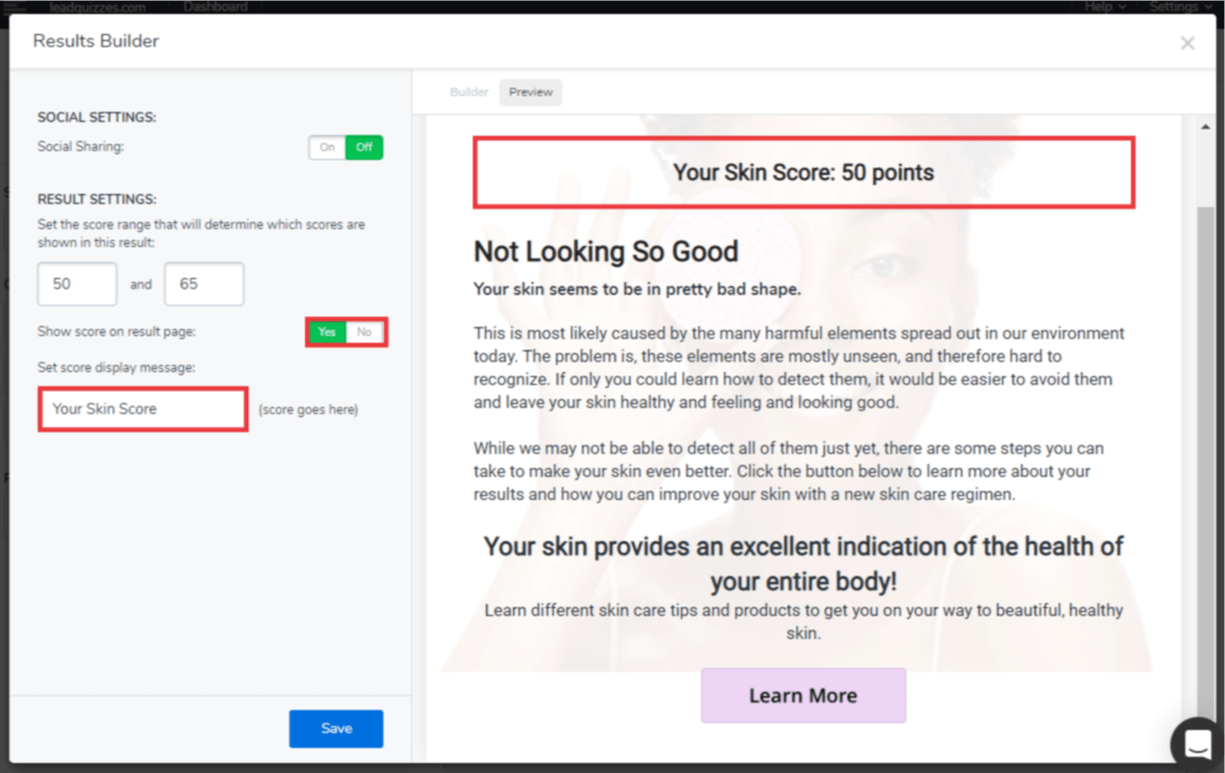
Note: You will get a warning message if the set score display message is left empty,
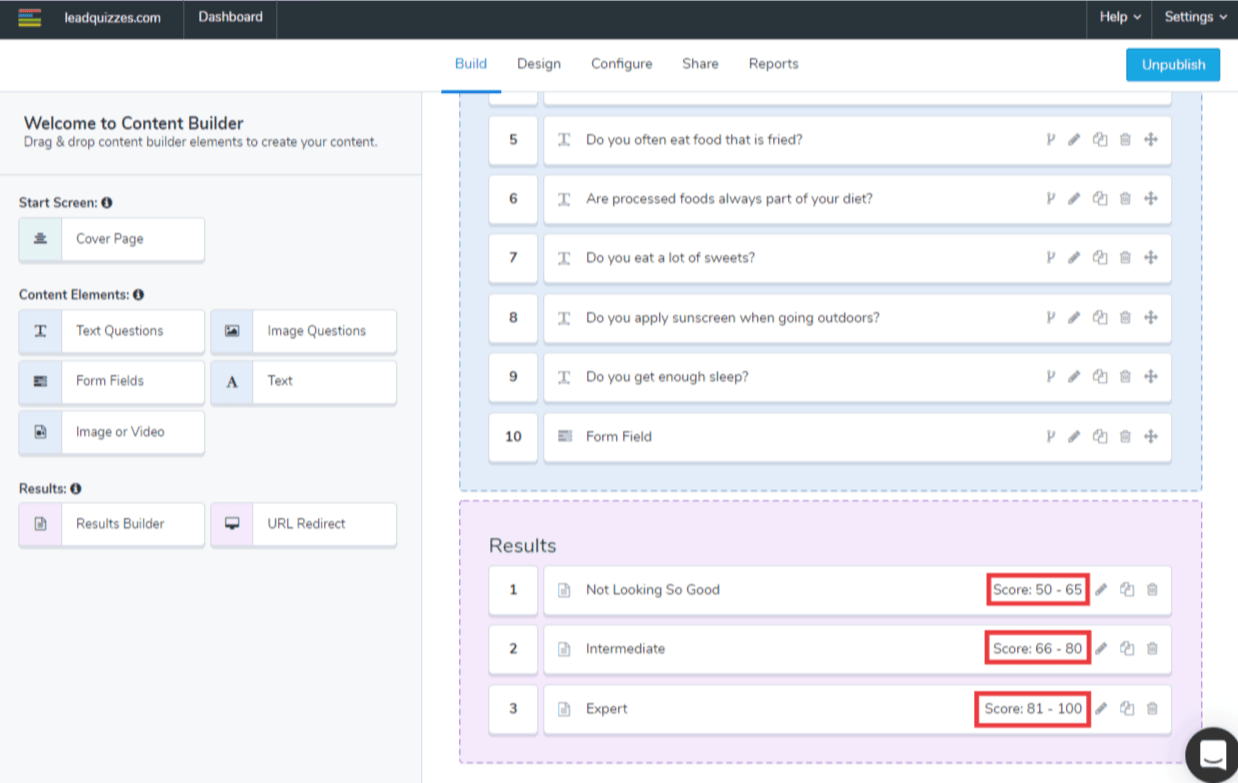
7. After you set the score range and save the Result, the score range should be displayed on the corresponding result on the Results section of the Content Builder.
8. Finally, in the response reporting section of your quiz content, you will be able to see the individual score of every selected answer as well as the total score.
