Website Popup
How Can I Configure Website Popup On LeadQuizzes 3 For My Website?
NOTE: Before you can configure website popup on LeadQuizzes 3 for your website, you need to have the embed & tracking code installed on all of the pages you want your website popup to trigger on. If you haven't done this yet, you can find a step-by-step guide on how to embed this code on different websites in ourhelp center.
Once you have installed your embed and tracking code, follow the steps below to configure website popup on LeadQuizzes.
1. Log in to your LeadQuizzes 3 account, click on the three dots of the quiz you want to configure the website popup on, and select ''Share''.

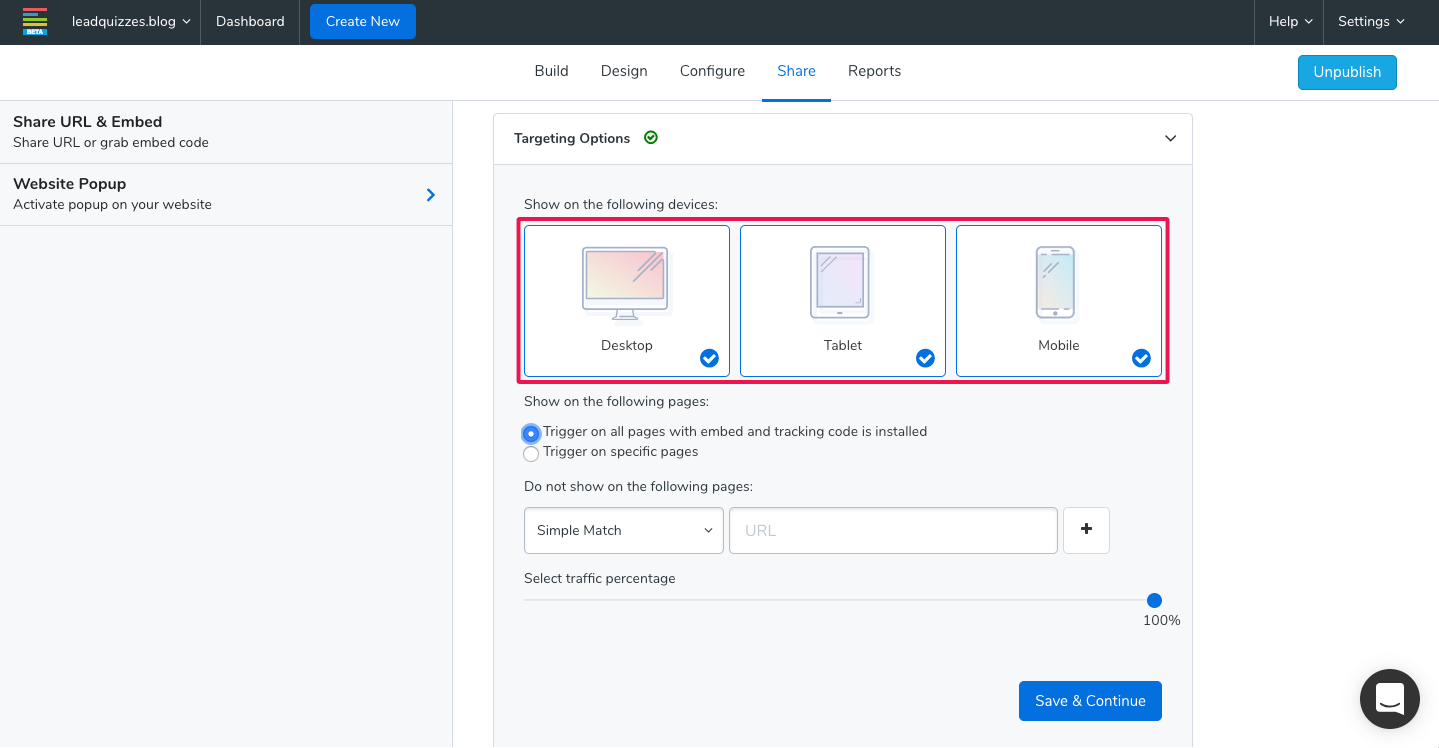
2. Next, go to the Website Popup tab to see the available configuration options. You can configure the Triggering Options and the Behavior of your website popup. You also have the option to Review and Activate your website popup.
Also, ensure that your Tracking code status is green, which indicates that your tracking code is installed on your website. In case you haven't installed your tracking code in the past, your Tracking code status would be red and you will be prompted to set this up.

3. The Targeting option gives you the option to select the devices where your LeadQuizzes will be shown: Desktop, Tablet or Mobile. By default, none of them will be selected, but you have the option to select one, two or all three of them. You can do this by clicking on the device tile as shown below.
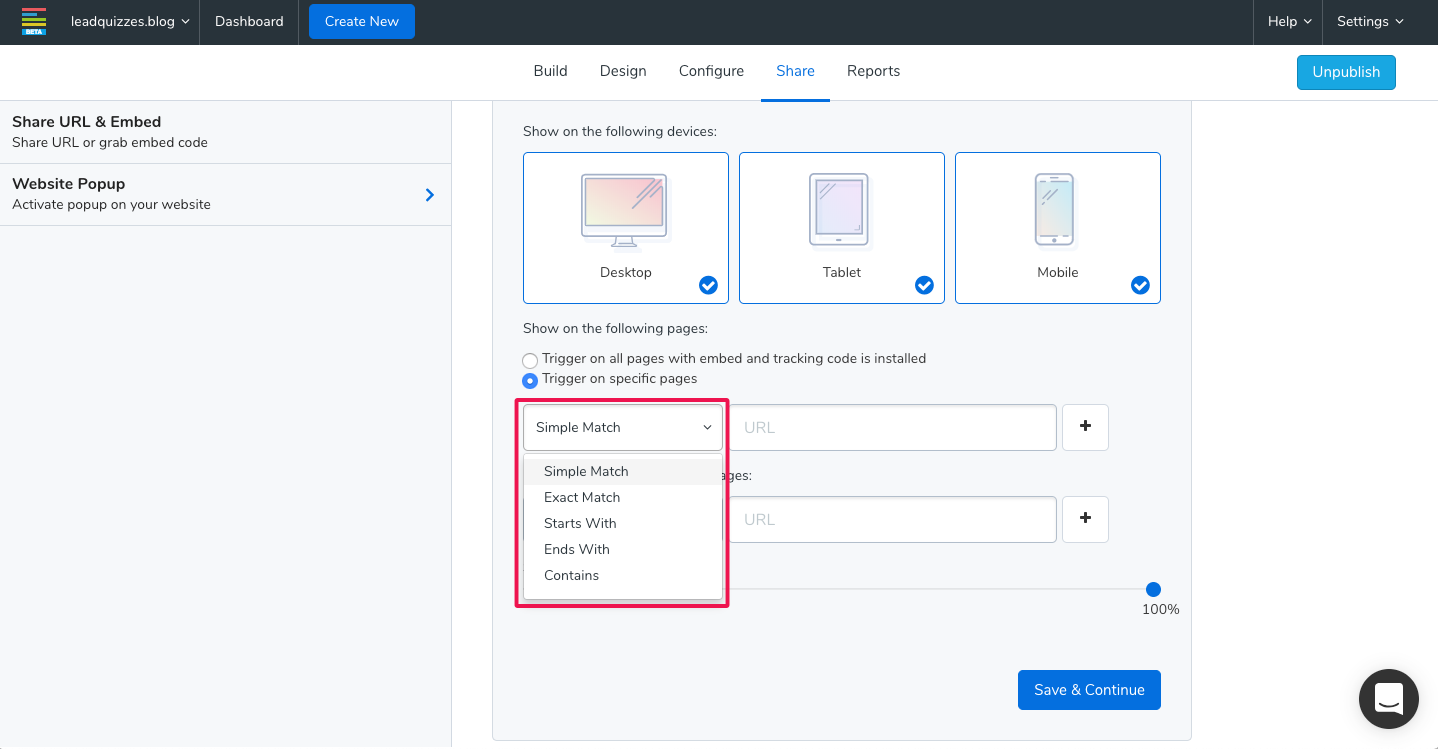
You also have the option to trigger website popup on all the pages on your website that contain your embedded and tracking code or you can trigger website popup on specific pages on your website where you have this embed and tracking code installed.
4. If you want to trigger website popup on specific pages on your website, first you need to choose the Match Type you want and then enter the exact Page URL. You can have multiple Match Types and multiple Page URLs as well as remove the ones that are already added. Below are the types of Match Types available and their meaning.
Simple Match: This is the default match type and it is used to target a page on your website, ignoring any query strings and fragments. The match will be correct if the URL path your visitor is on matches the URL path you specify.

Exact Match: This targets a specific URL, including the protocol, which can include a query string and fragment. The match will be correct if the URL path, query string and fragment your visitor is on match EXACTLY the ones you specify.

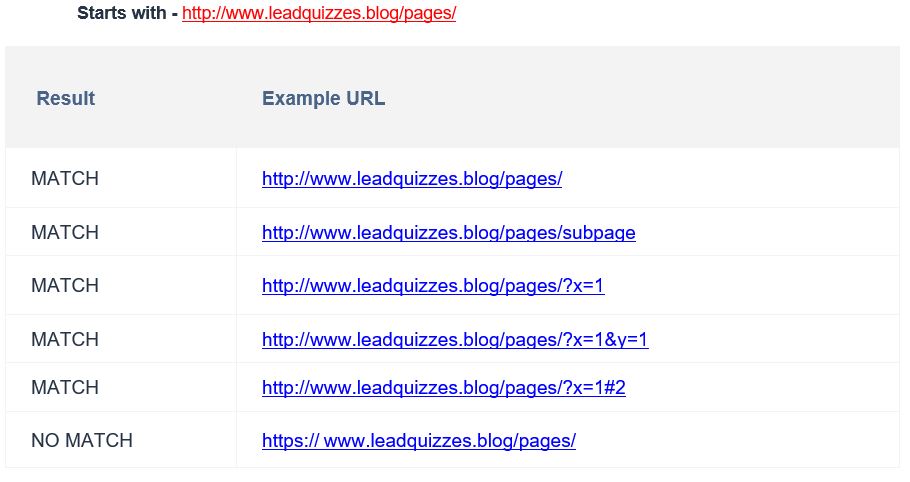
Starts With: This targets all pages that have a URL, including the protocol, which starts with the entered text. The match will be correct if the URL your visitor is on, starts exactly as you specify it, including the protocol.
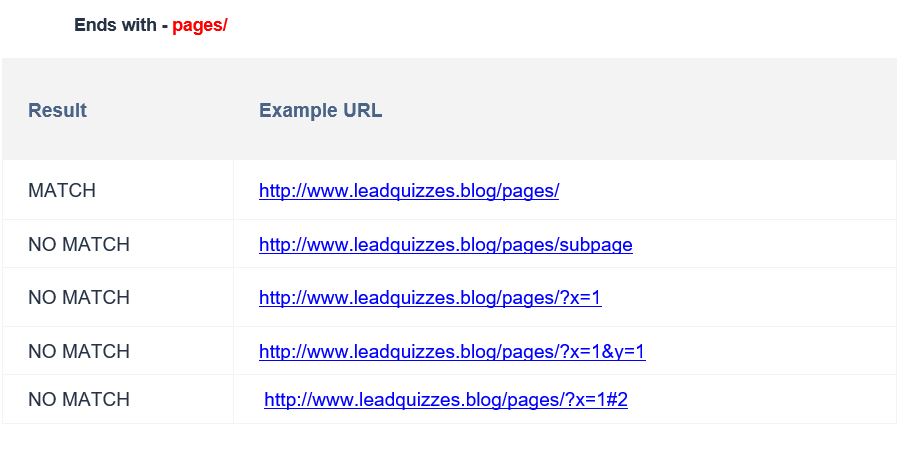
Ends With: This targets all pages that have a URL which ends in the entered text. The match will be correct if the URL your visitor is on, ends exactly as you specify it.
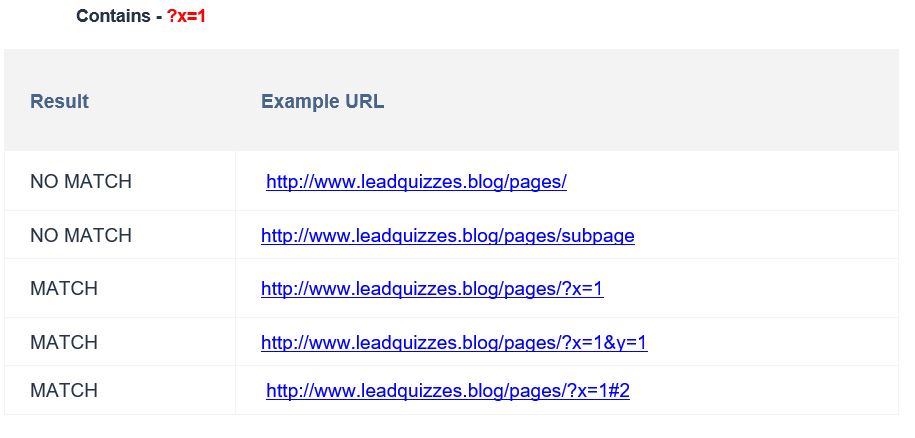
Contains: Targets all pages which contain the entered text. The match will be correct if the URL your visitor is on, contains the text you specified.
5. You can also choose to exclude website popup on specific pages on your website. To do this, first choose the Match Type you want and then enter the exact Page URL you want to exclude website popup from. You can have multiple Match Types and multiple Page URLs as well as remove the ones that are already added.
** NOTE: The drop down options and explanation for Match Types are the same.**
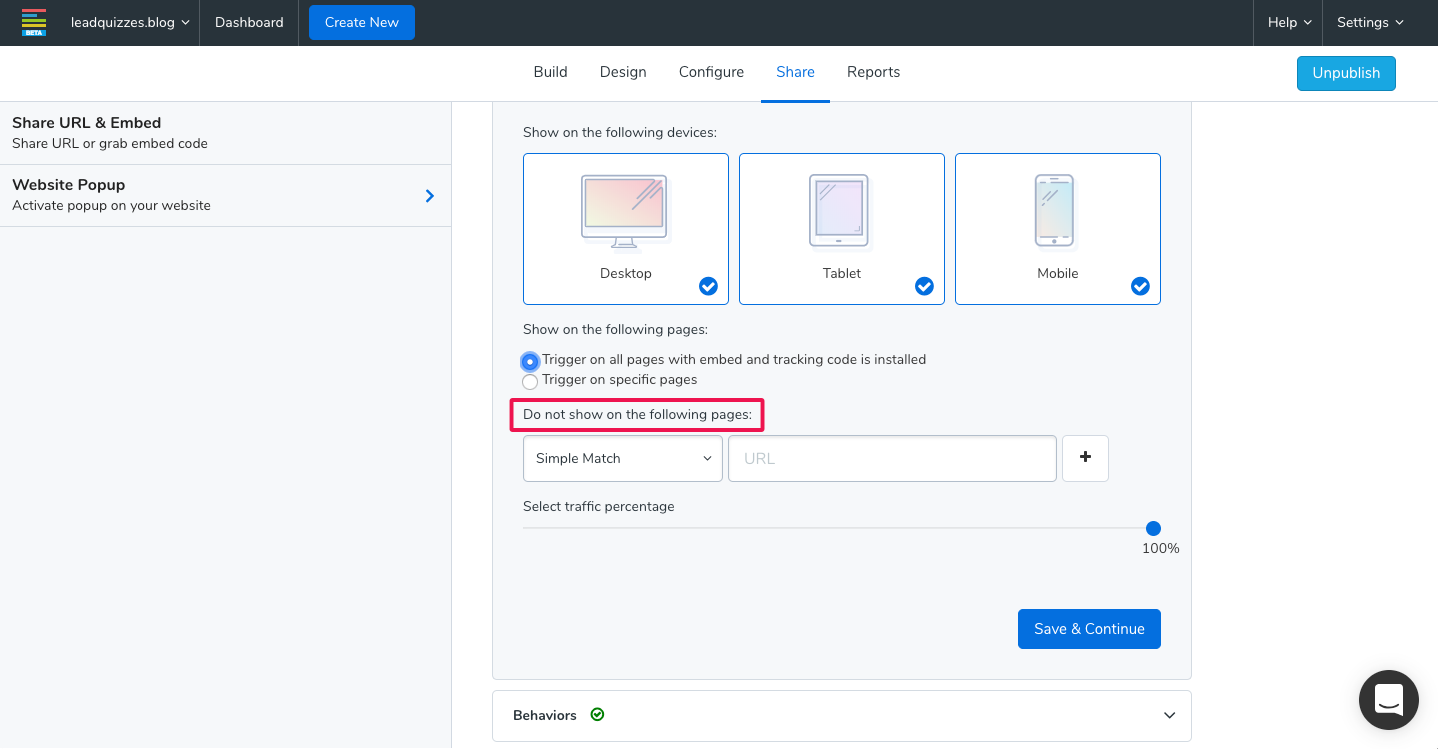
6. You also have the option to set up the Traffic Percentage of users that will see your website popup content. By default, this slider will be set to 100% which implies that the website popup content would be shown to every visitor. If, for example, you set the traffic percentage to 25%, the website popup content will be shown to every 4th person that visits your site.
Once you are done configuring your triggering options for your website popup, save your settings and continue to the Behavior settings.

7. The Behavior settings give you the ability to set the Launch options as well as the Frequency options for your website popup.

8. With the Launch option, you can set the timing of when your website popup content will be shown to your visitor (Note that only one launch option can be chosen at a time). The following Launch options are available:
After page loads: With this option, your website popup content will be shown right after the page is fully loaded.
After time delay of X seconds: With this option, you can set a time delay (in seconds) of when your website popup content will be shown after the visitor lands on your page.
Exit-Intent: With this option, your website popup content will appear upon the visitor's intent to leave your site. You have the option to choose among 3 levels of sensitivity. High, Medium and Low. (High sensitivity will cause the website popup to be triggered when the visitor’s cursors is further away from the view port than a Medium or Low sensitivity setting would). Note that Exit-intent will only work on desktop, and not on mobile and tablet.
Scroll percentage: By selecting this option you will be able to set at what point the website popup content will appear when a visitor scrolls through the page. You can choose between 0 and 100% of the page height.
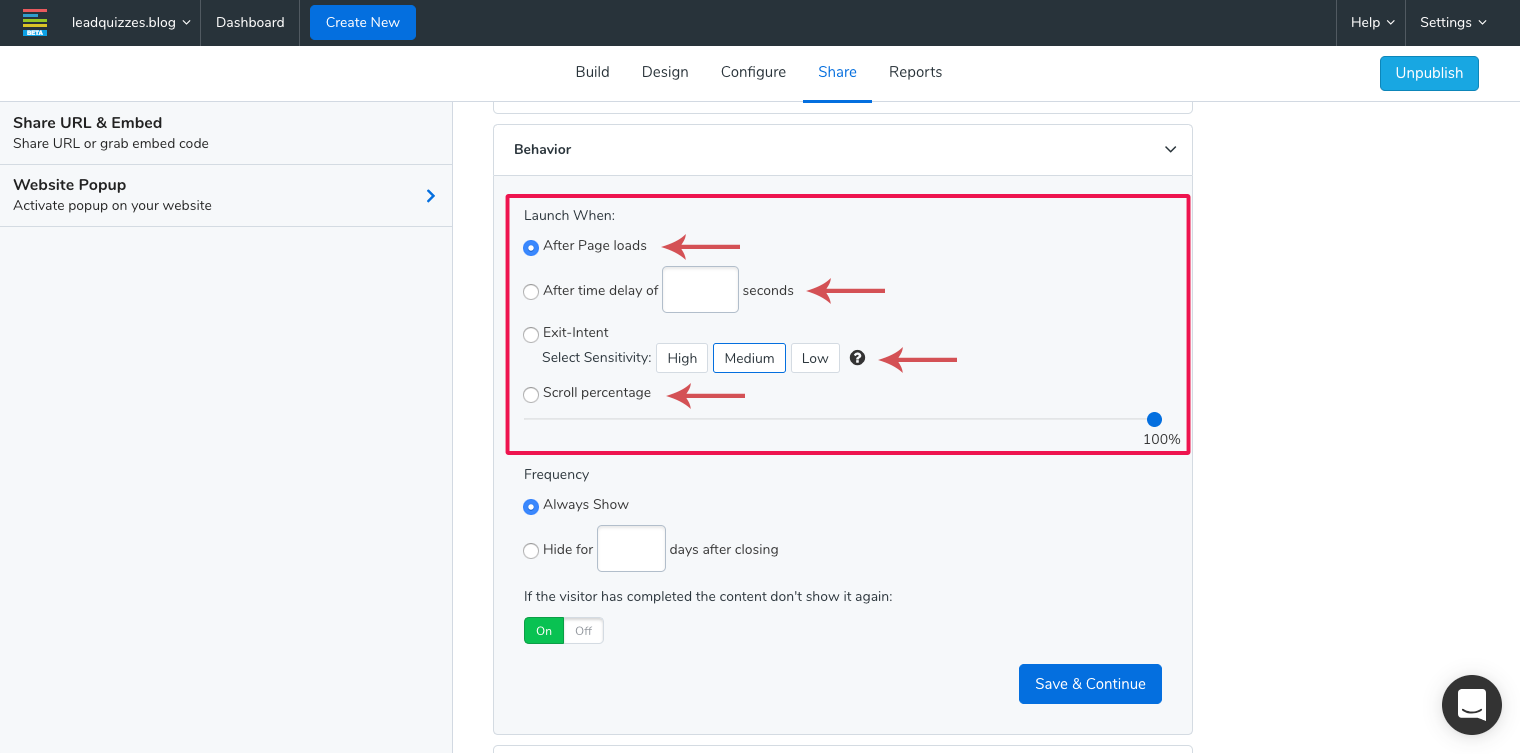
9. With the Frequency option, you can set the frequency at which your website popup content is shown to the same visitor. (Note that only one frequency option can be chosen at a time). The following Frequency options are available:
Always Show: With this option, your website popup content will be shown always to the same visitor right after the page is fully loaded.
Hide for X days after closing: With this option, you can set a delay (in days) of when your website popup content will be shown to the same visitor after the page is fully loaded.
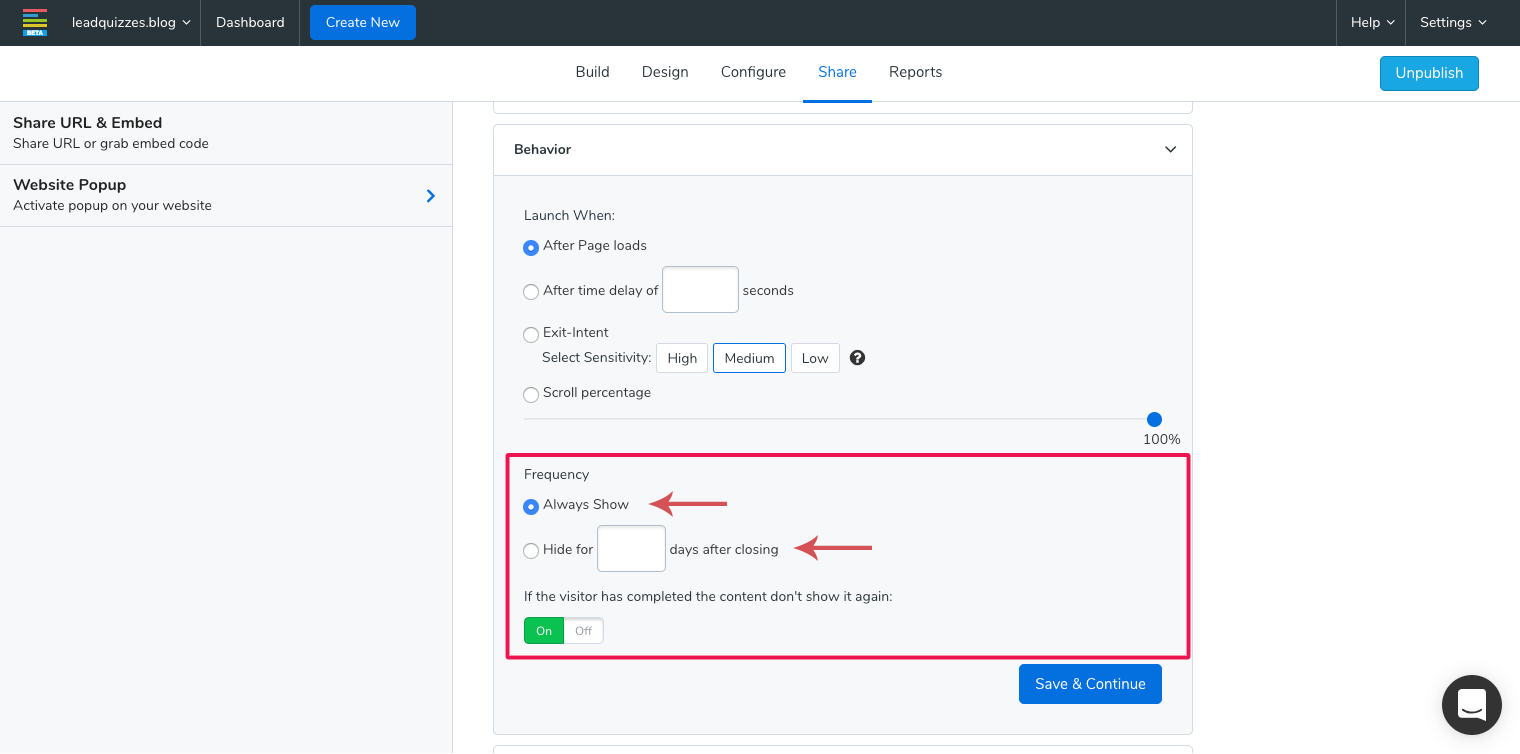
10. You can also choose to enable or disable website popup for visitors that have completed your content at some previous time. You can do this by turning the icon ON or OFF.
Once you are done configuring your behavior options for your website popup, save your settings and continue to the Review & Activate settings.

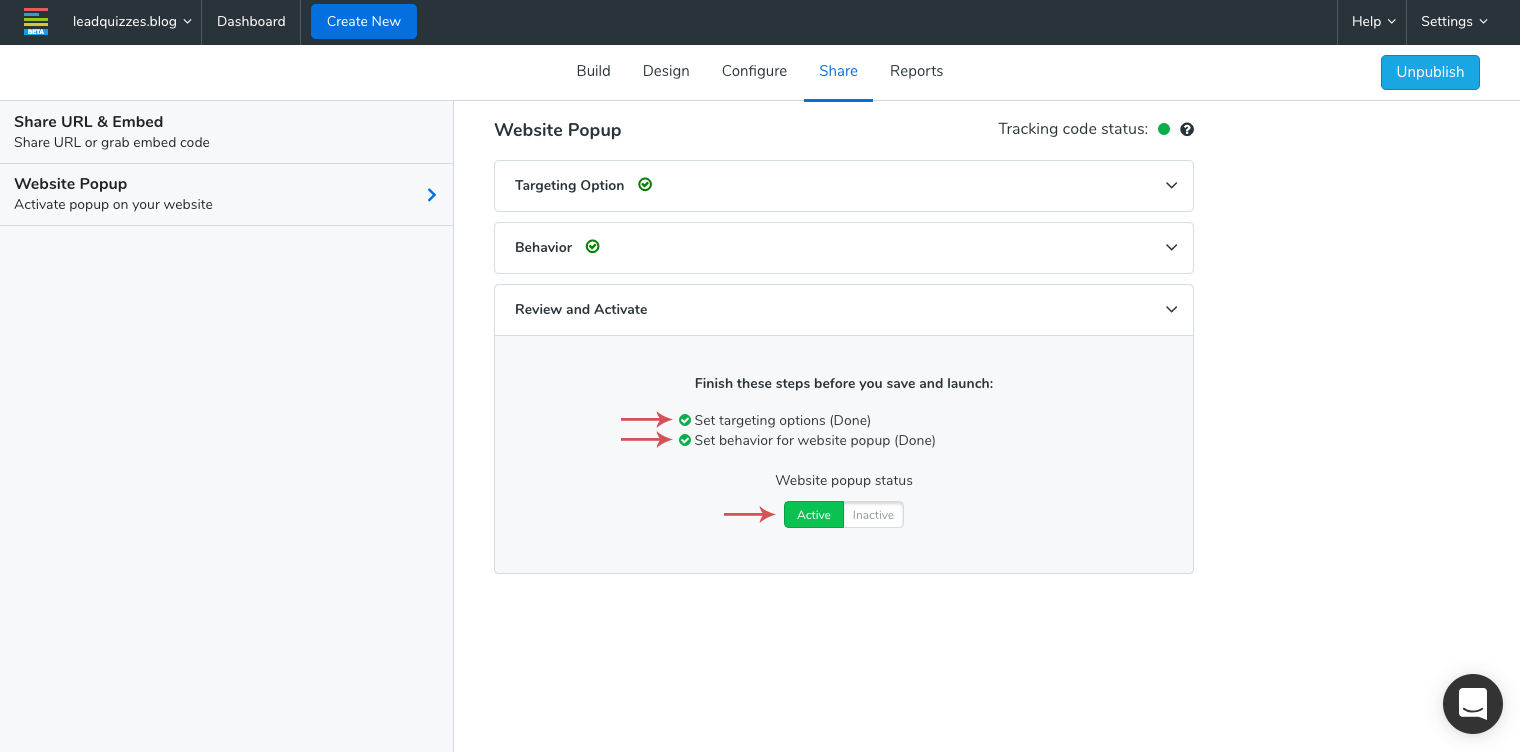
11. Finally, the Review and Activate section allows you to check that you have setup all the conditions necessary for the website popup to work. It also allows you to turn it off & on. By default the website popup is off and you have to turn it on.