UTM Web Tracking
In this article, we will be walking you through how you can add UTM parameters to your Deployed Content URL and use them in your quizzes.
- How to add UTM parameters to your Deployed Content URL.
- How to Enable or Disable UTM tracking on your content.
- How to view & export the UTM parameters in your content Reporting for Individual Responses.
- How to send UTM parameters to your Integrations.
- How to pass UTM parameters to your content Results CTA button.
How to add UTM parameters to your Deployed Content URL.
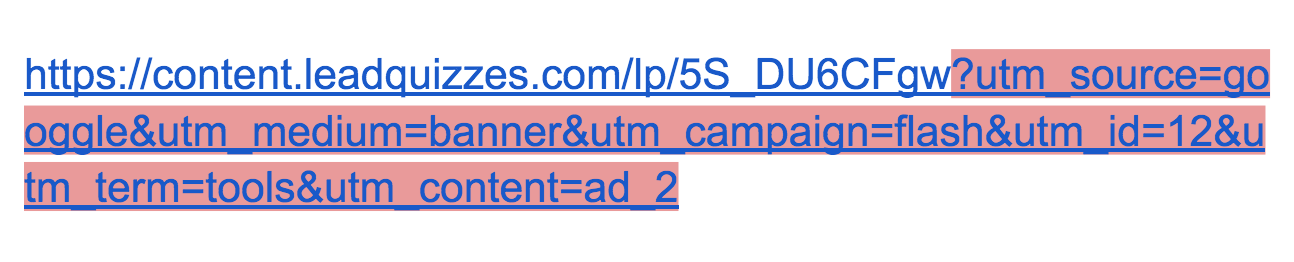
On your Deployed Content URL, add the supported UTM elements you want to the end of the URL. LeadQuizzes supports the six (6) UTM elements listed below:
- utm_source=[string]
- utm_medium=[string]
- utm_campaign=[string]
- utm_id=[string]
- utm_term=[string]
- utm_content=[string]
Example Of LeadQuizzes Deployed Content URL With UTM Parameters
 Example Of LeadQuizzes Content Embedded On User Site URL With UTM Parameters

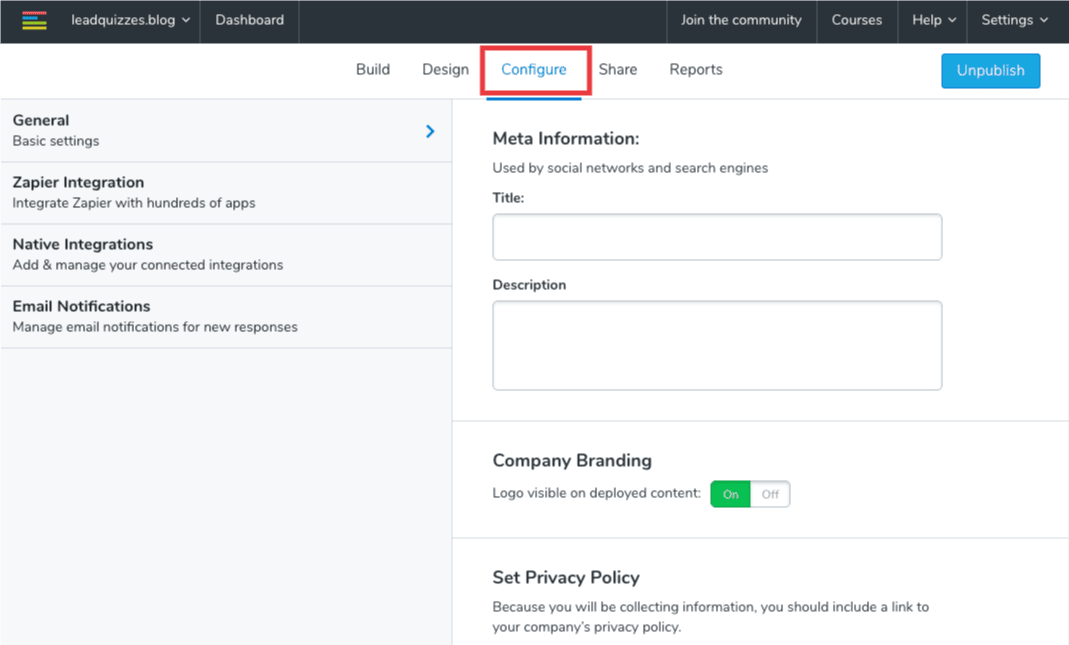
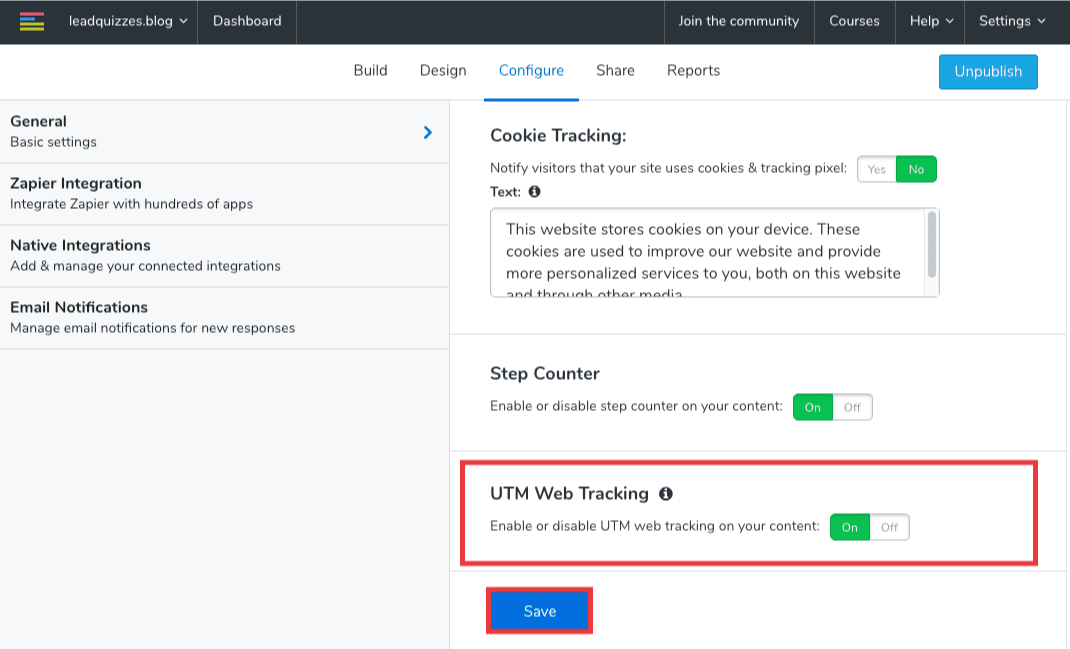
How to Enable or Disable UTM Tracking on your content.
1. To Enable or Disable UTM Tracking on your LeadQuizzes content, go to your content dashboard and select the tab “Configure”.
How to view and export the UTM parameters in your content Reporting for Individual Responses.
1. Go to your content "Reports" dashboard, and click "Response". You will see a preview of all your respondents as well as the date and time they individually responded.
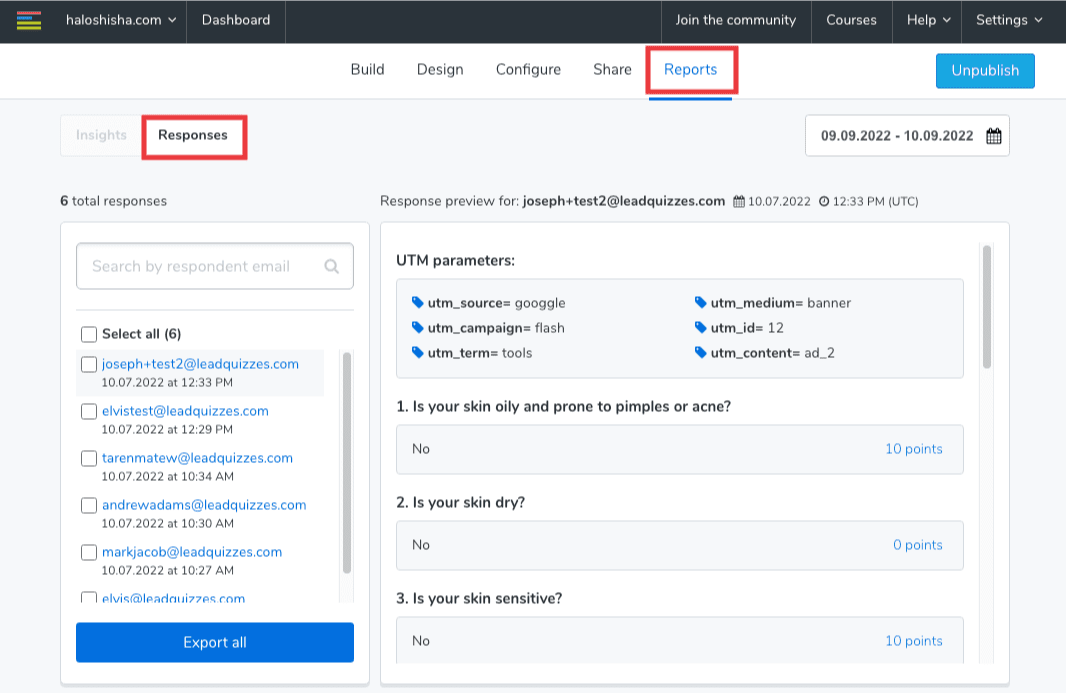
2. Next, select one of the contact records that have UTMs already gathered and you will see the UTM tags.
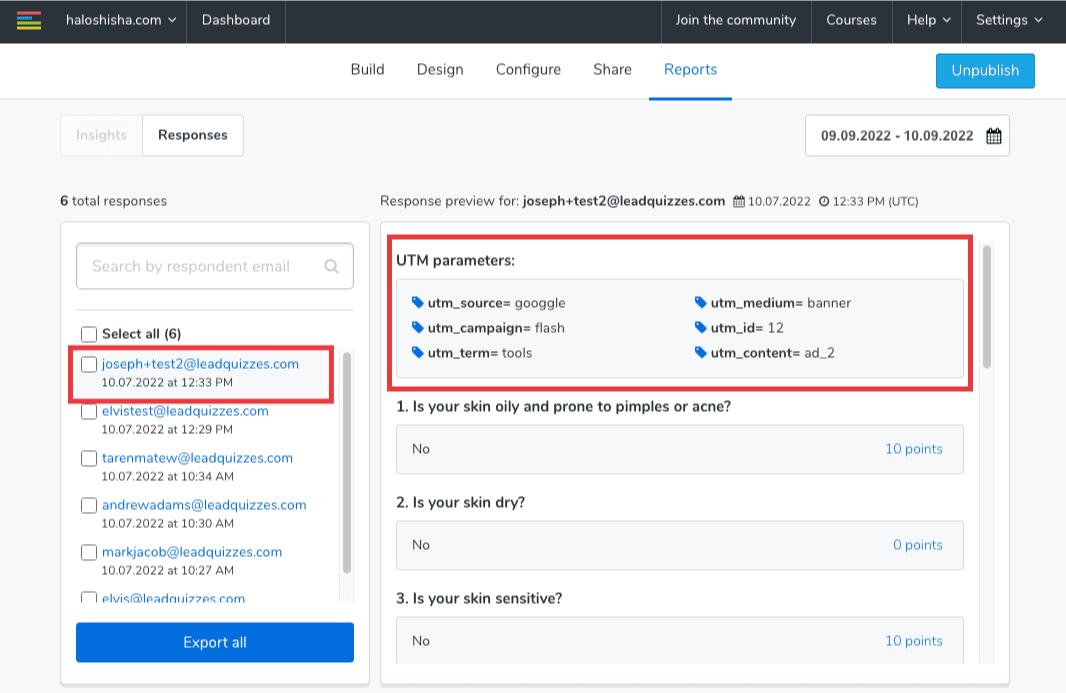
3. Lastly, you can export all your respondent's data by clicking the "Export all" tab, and following the instructions in the popup.

In the exported CSV file, you will find those UTM parameters that you added to your Deployed Content URL.

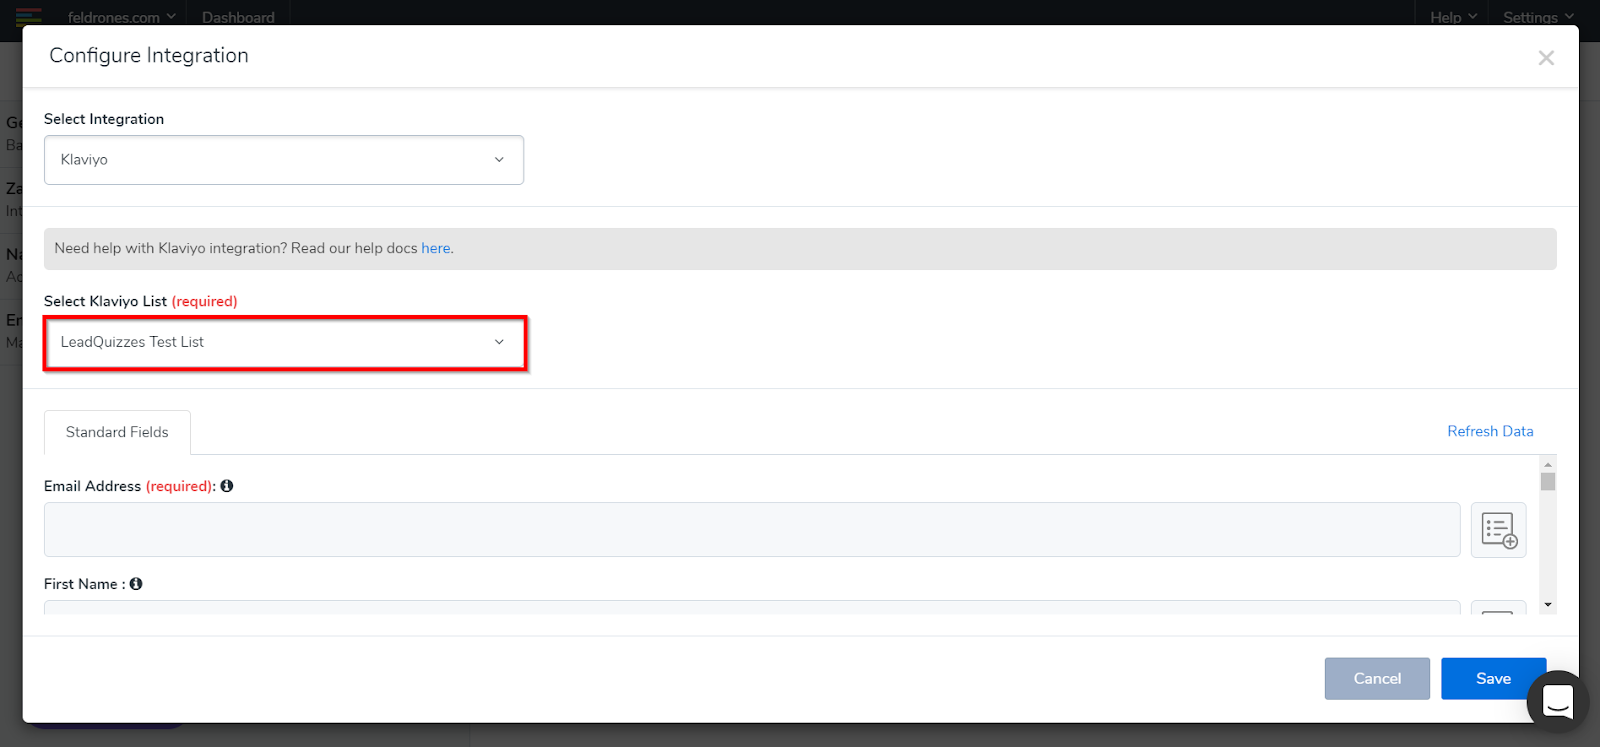
How to send UTM parameters to your Integrations.
1. On the Configure page, click "Native Integrations" on the left side and then click the "Add Integrations" button on the Native Integrations page.

2. On the Configure Integration popup window, select your integration from the drop-down menu.

Note: Only the integrations set up on the Integrations page in your website account will appear in the drop-down menu.
3. Next, select your integration list from the "Select list" drop-down menu. Only the lists that are set up in your integration account will appear in the drop-down menu. All your integration Contact Property Fields will be loaded onto the Configure Integration popup window.
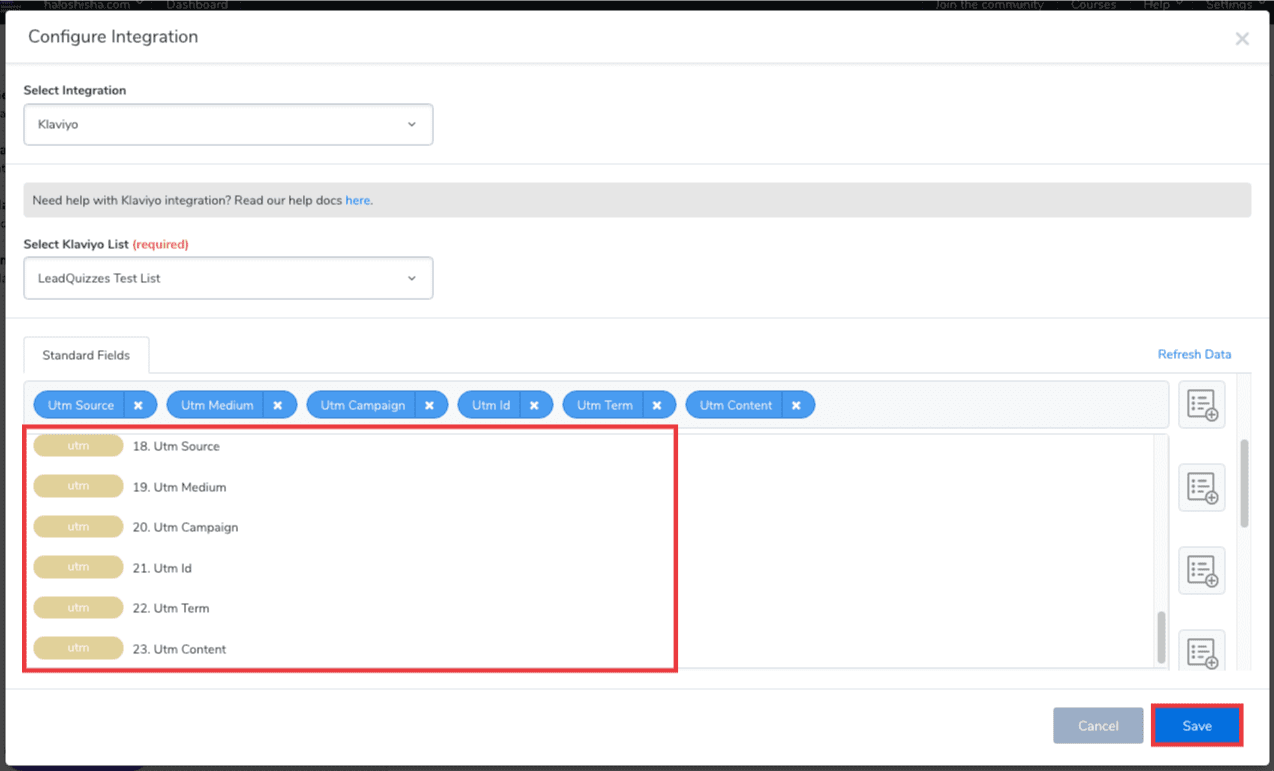
4. To map your UTM parameters to your integration fields, click the "Map Data" icon next to the field you would like to assign the data to, and select the UTM elements from the drop-down list. Finally, click the "Save" button to complete configuring your Integration.
How to pass UTM parameters to your content Results CTA button.
1. In the Result Builder, go to ''Button Settings'' on the left-hand side and turn it ON. Next, label your Button, add the URL link for the Button and click ''Save''.
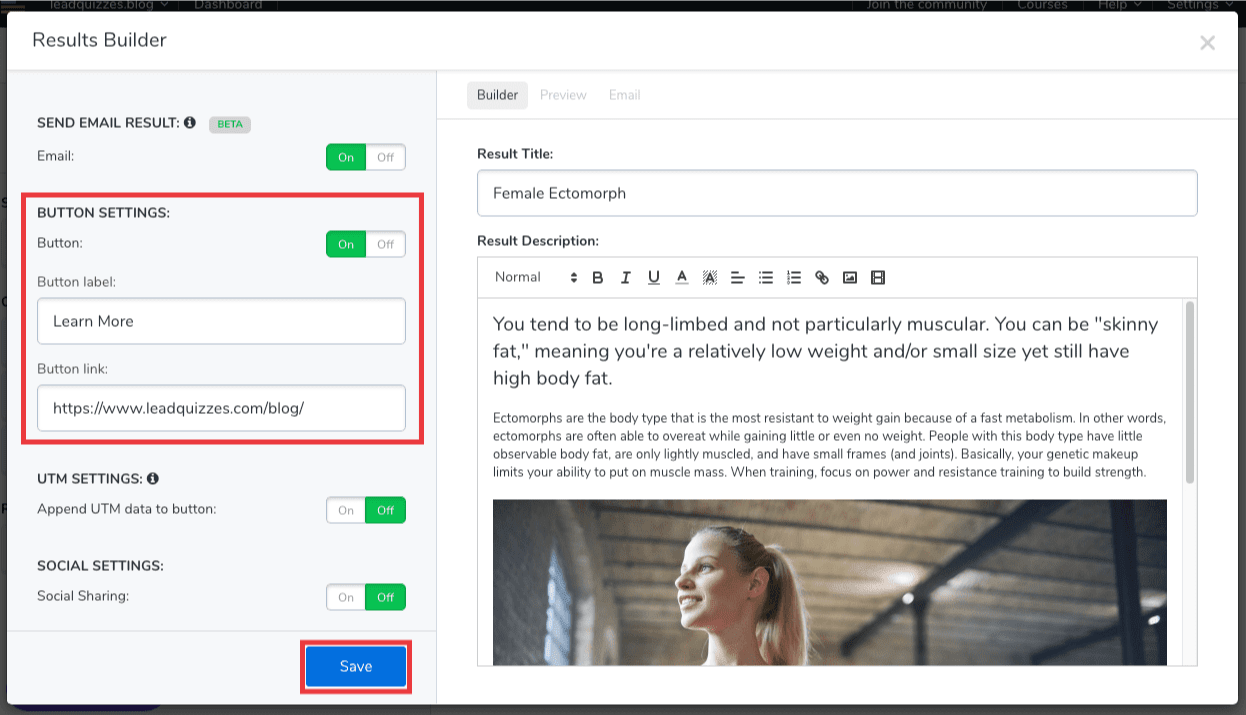
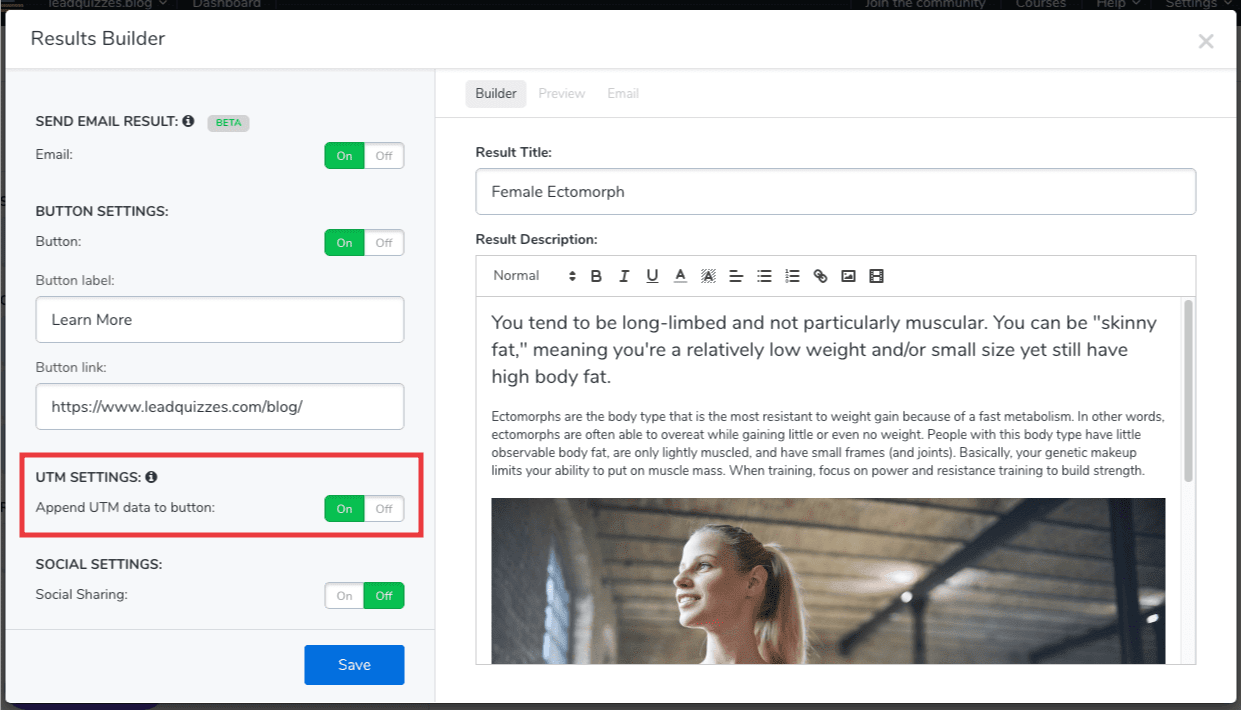
3. Lastly click "Save" to save your settings and all the URL Parameters from the URL will be appended to the CTA button.
